The Challenge: Failing Crawl Space Support Beams and Persistent Moisture Issues
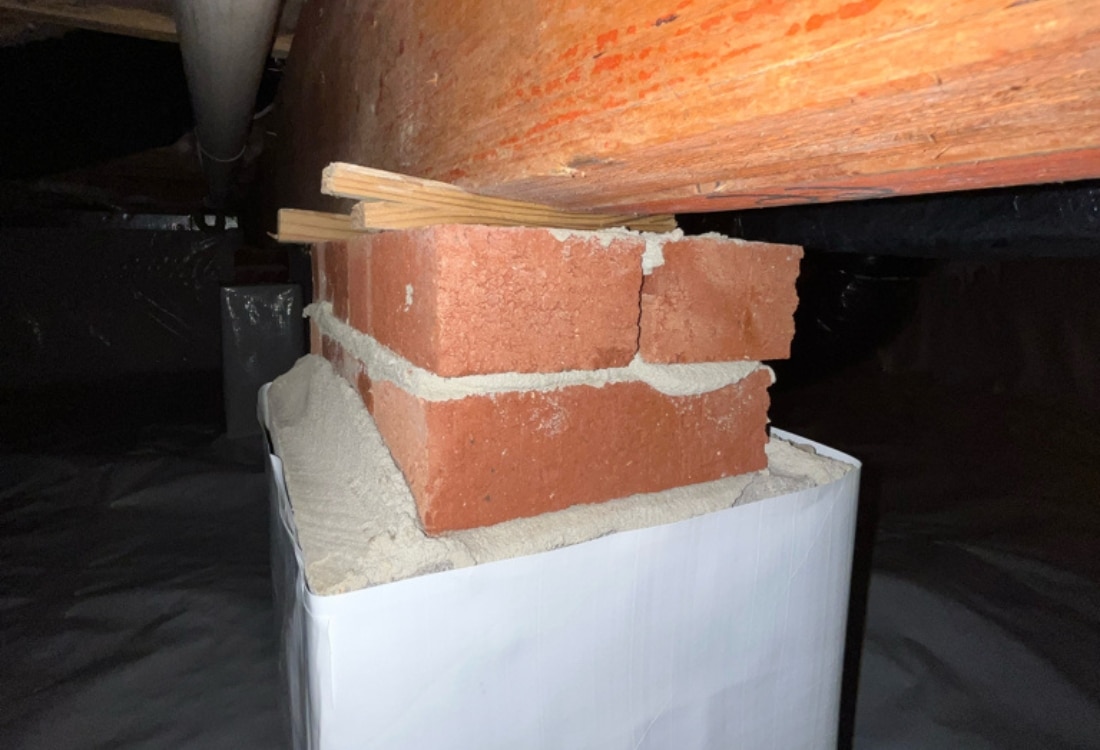
Jeannette’s crawlspace in Charles Town, WV, faced structural and moisture-related challenges threatening her home’s stability and safety. Over time, the wood shims supporting the main girder beam had deteriorated, leaving gaps that compromised the structure’s integrity.
This led to sagging floors, creaking noises, and worsening instability, leaving her wondering how to effectively support floor joists in a crawl space to avoid costly foundation repairs if left unaddressed.
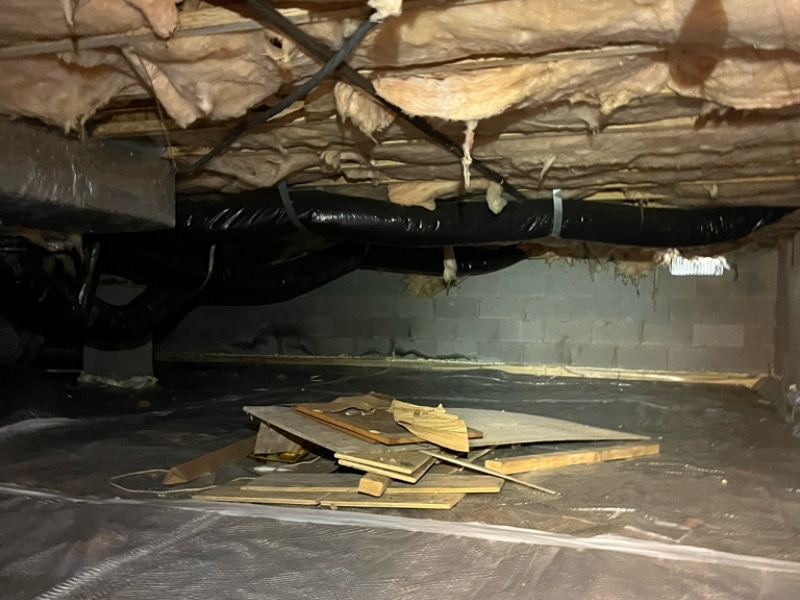
During a detailed inspection, the LUX Foundation Solutions team identified several contributing factors. The crawlspace lacked proper insulation and humidity control, while exposed dirt floors continuously released moisture into the air.
This damp environment accelerated the deterioration of wooden components, creating ideal conditions for mold growth, wood rot, and declining indoor air quality. The failing floor supports in the crawl space threatened the home’s structural stability and posed significant health risks to Jeannette’s family.
Recognizing the urgency, the LUX team developed a comprehensive plan to stabilize the crawlspace supports, manage moisture, and create a healthier living environment.
The Solution: Crawl Space Support Beams Reinforcement and Encapsulation
The LUX team implemented a comprehensive solution to stabilize the crawlspace and protect the home from moisture-related issues:
Crawlspace Encapsulation
Step 1: Preparing the Crawl Space
The LUX team cleaned the crawlspace thoroughly and removed debris, dirt, and obstructions. This step ensured a clean, stable environment for the encapsulation and improved floor supports in the crawl space.
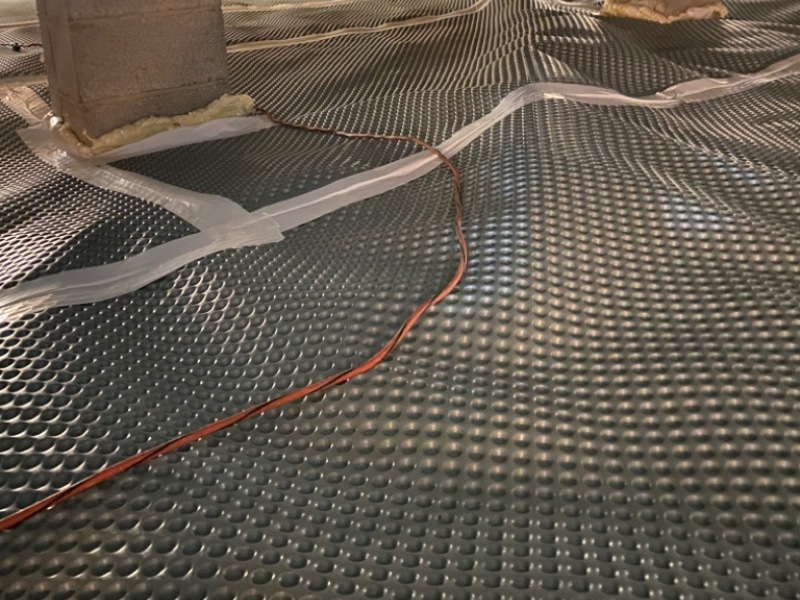
Step 2: High-Performance Crawlspace Matting
After cleaning, a heavy-duty crawlspace matting system was installed across the floor. This durable barrier effectively resisted moisture intrusion from the ground, enhanced the cleanliness of the area, and laid the foundation for a dry and protected crawlspace environment.
Step 3: Wall Insulation Installation
High-quality wall insulation was installed along the crawlspace walls. This premium insulation improved temperature regulation, reduced energy loss, and contributed to a more energy-efficient home.
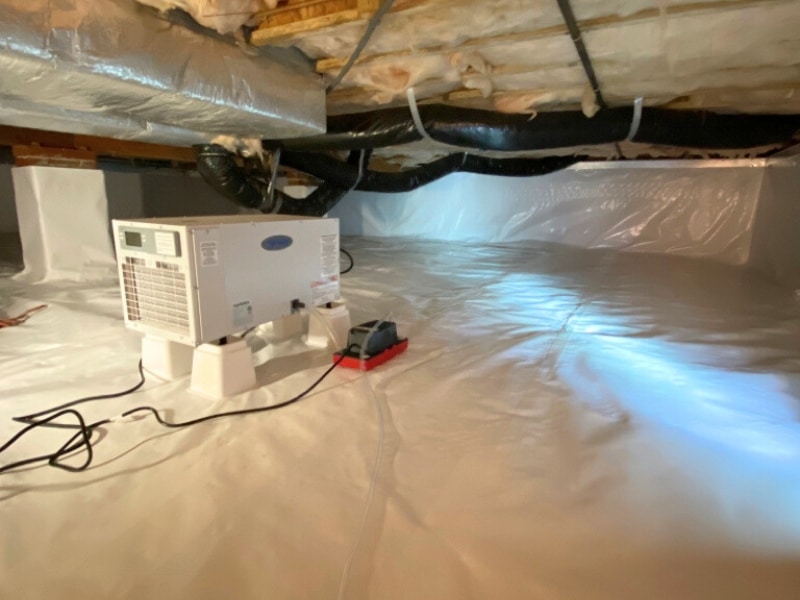
Step 4: 20ML Vapor Barrier Installation
A 20ml vapor barrier was added to cover the crawlspace floor and walls. This barrier created a continuous seal that blocked moisture from rising into the space, protecting structural components and preventing water vapor from contributing to damp conditions that could grow mold and weaken the crawl space support beams.
Step 5: Dehumidifier Installation
The team added a professional-grade dehumidifier to maintain a controlled and healthy environment. This system effectively managed humidity levels, preventing mold growth. It also ensured the longevity of the floor supports in the crawlspace by protecting them from moisture damage and significantly improving indoor air quality.
Crawl Space Support Beams Stabilization
Step 6: Removal of Failing Wood Shims
The deteriorated wood shims were carefully removed to prepare the girder beam for a stable foundation.
Step 7: Installation of Metal Shims and Non-Shrink Grout
Heavy-duty metal shims were installed on the existing cinder block columns to restore structural stability during the crawl space support beams repair. Non-shrink grout was applied to fill all gaps, creating a secure and long-lasting connection between the girder beam and its supports.
The Outcome: A Stable, Dry, and Energy-Efficient Crawl Space
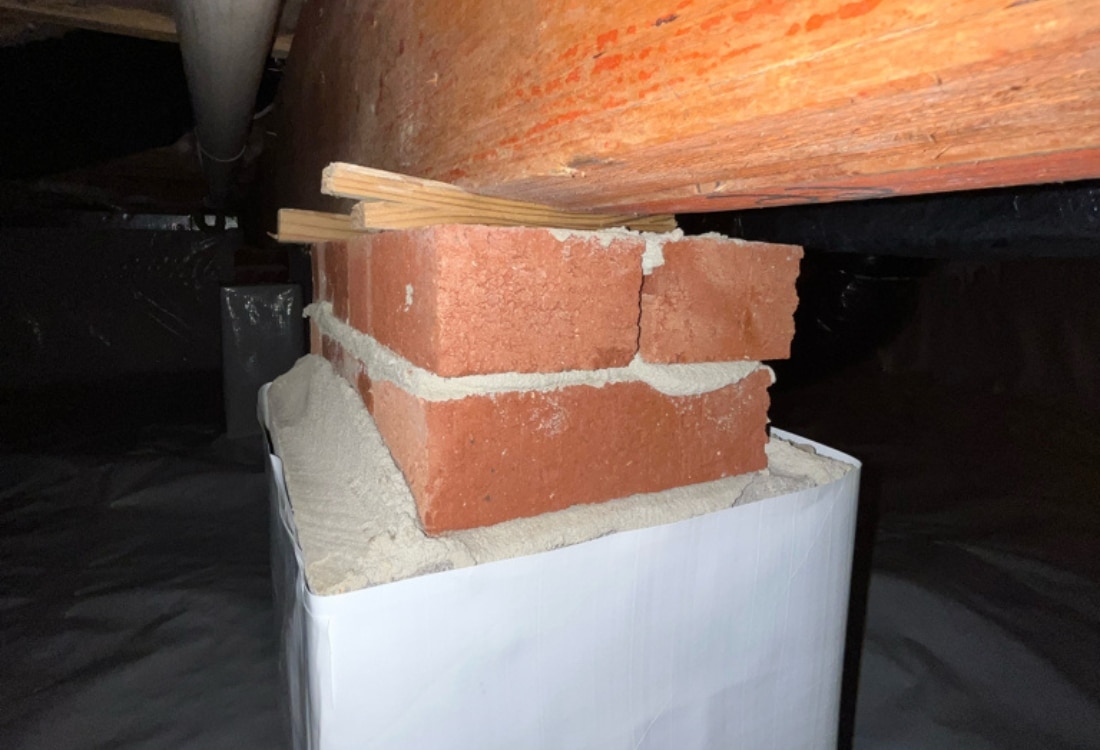
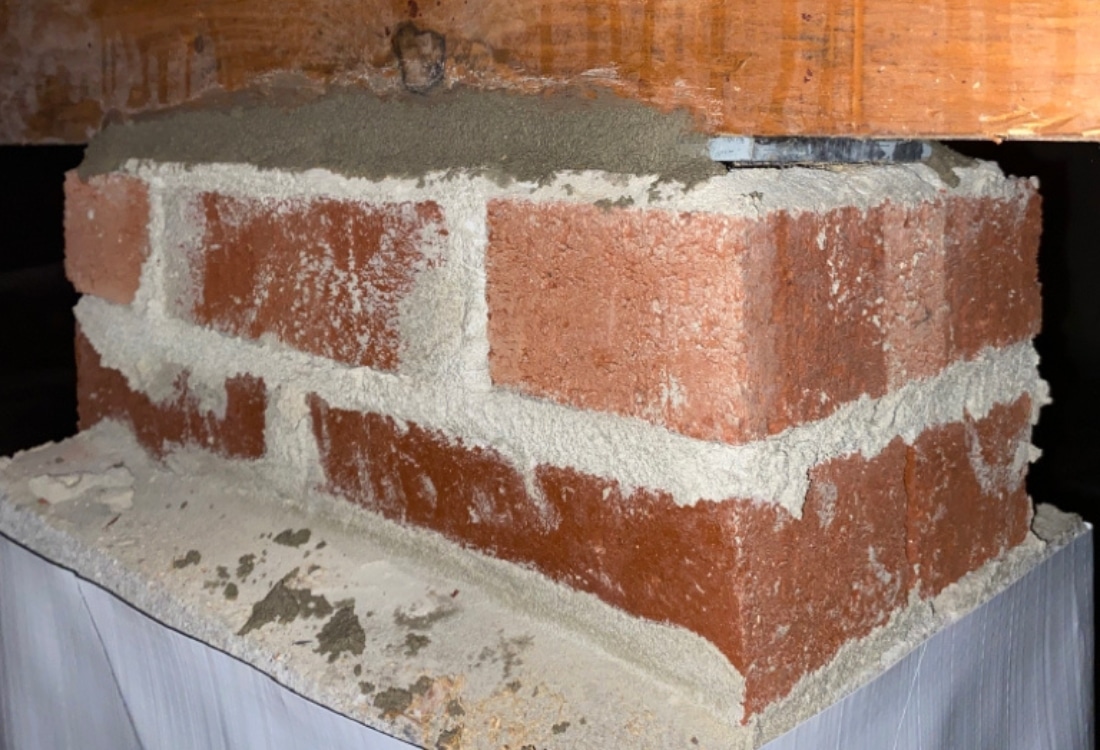
After the project, Jeannette’s crawlspace was transformed into a stable, dry, and energy-efficient environment. Structural issues caused by deteriorating wood shims were resolved by replacing deteriorated wood shims with heavy-duty metal shims and adding non-shrink grout to repair and reinforce the crawl space support beams. This upgrade eliminates sagging floors, creaking noises, and potential foundation risks.
The encapsulation system addressed the moisture problems, creating a clean, protected crawlspace environment. Heavy-duty matting, wall insulation, a 20ML vapor barrier, and a professional-grade dehumidifier prevent mold growth, wood rot, and poor air quality.
With regulated humidity levels and improved temperature control, Jeannette now enjoys lower utility bills, greater comfort, and a healthier home environment.
With these upgrades, her home is now safer, healthier, and better protected for the future.
Upgrade Your Crawlspace Today
Jeannette’s home is now safer and more comfortable, the crawlspace has been reinforced, and moisture concerns have been addressed.
Structural and moisture issues can quickly escalate, threatening the safety and comfort of your home. At LUX Foundation Solutions, we specialize in crawl space support beam stabilization, encapsulation, and waterproofing solutions tailored to your needs.
Call us today at 540-508-8587 for a free estimate and discover how we can protect your home from the ground up!

