Written By Bridget Stieb, Director of Marketing at LUX Foundation Solutions •
Reviewed by LUX’s foundation repair specialists serving Northern Virginia & Florida
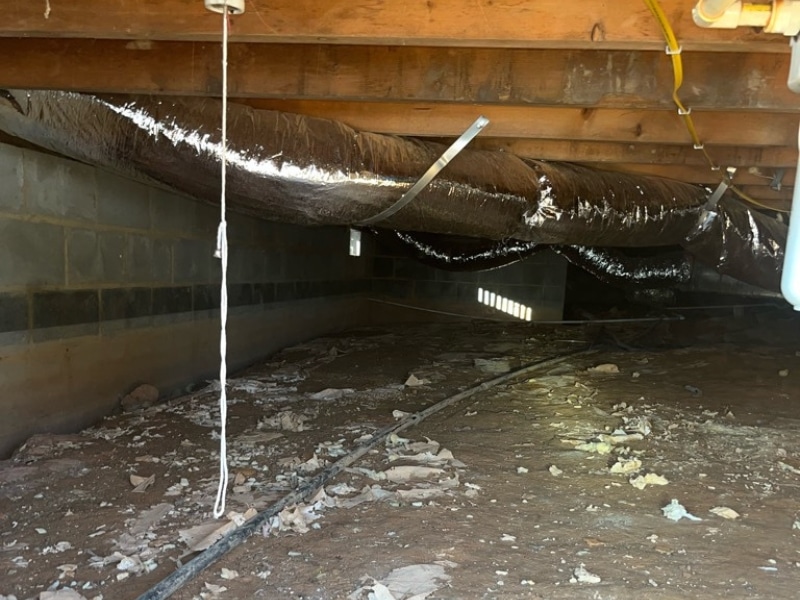
The Problem: Water Intrusion Causing Crawl Space and Floor Stability Concerns
Christie had been concerned about conditions beneath her home for some time. After receiving an estimate from Tom at LUX Foundation Solutions in 2024, she revisited the issue when the symptoms became more noticeable. Water was collecting in the crawl space, the floors felt increasingly uneven, and gaps had begun appearing along portions of the ceiling.
Another contractor had also inspected the crawl space, raising concerns about possible mold and termite-related damage. These are common warning signs of crawl space moisture problems resulting from long-term exposure, in which excess water and humidity begin to affect the crawl space environment and the structural components supporting the home.
Wanting a clear understanding of the problem and a permanent solution, Christie contacted LUX Foundation Solutions to evaluate the crawl space and determine the best path forward.
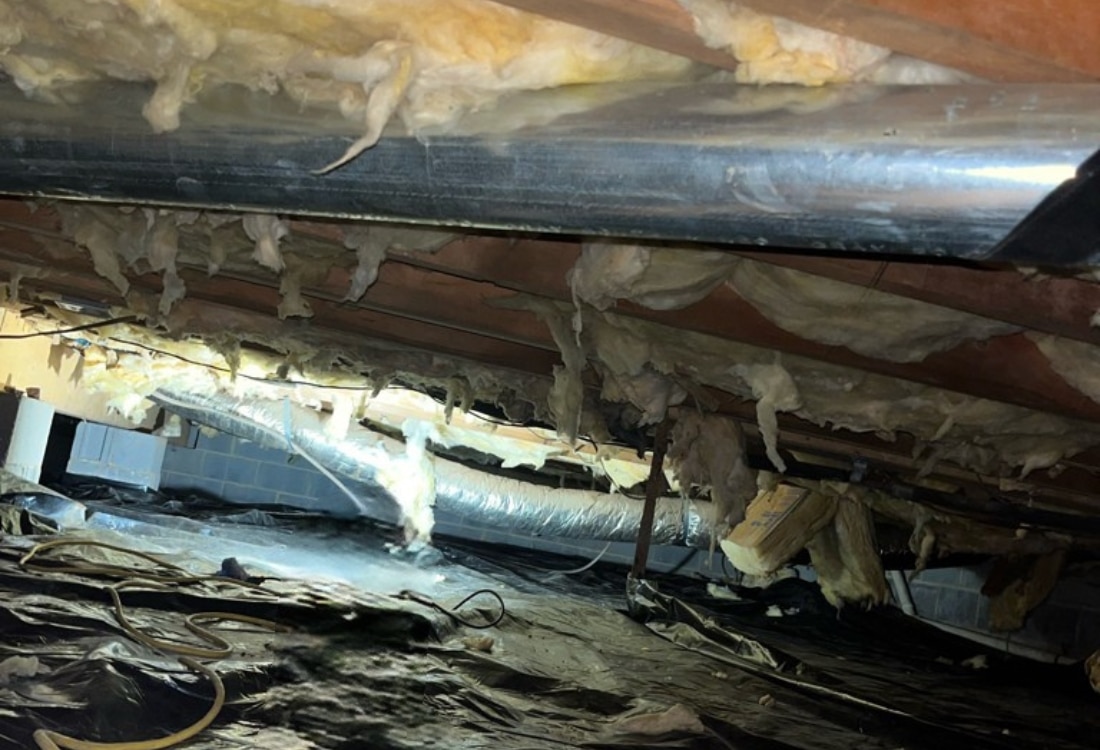
Our Assessment: Long-Term Moisture Exposure Affecting Crawl Space Conditions
After a detailed inspection, our team identified multiple moisture-related conditions contributing to the homeowner’s concerns about floor stability, water intrusion, and the overall condition beneath the home.
What the inspection found:
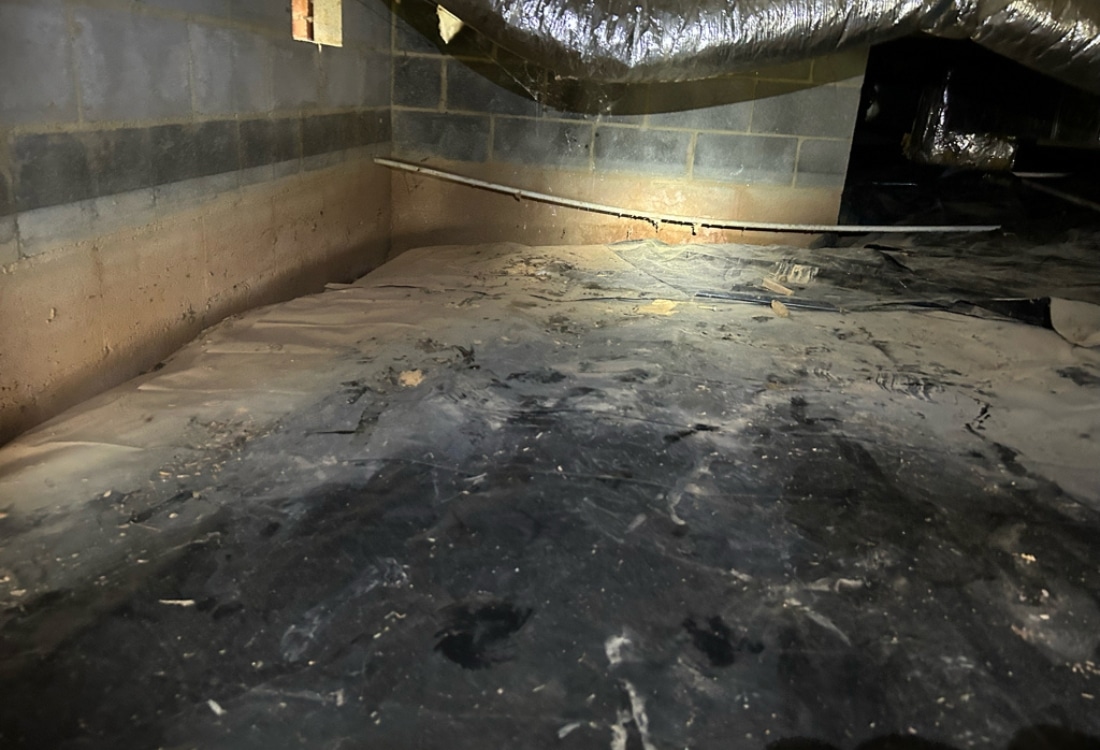
- Damaged vapor barrier that was no longer providing effective ground moisture protection.
- Deteriorated crawl space insulation due to prolonged moisture exposure.
- Damaged floor support components require structural reinforcement.
- No interior crawl space drainage system to collect and direct water away from the area.
- Existing conditions allow water to accumulate beneath the home.
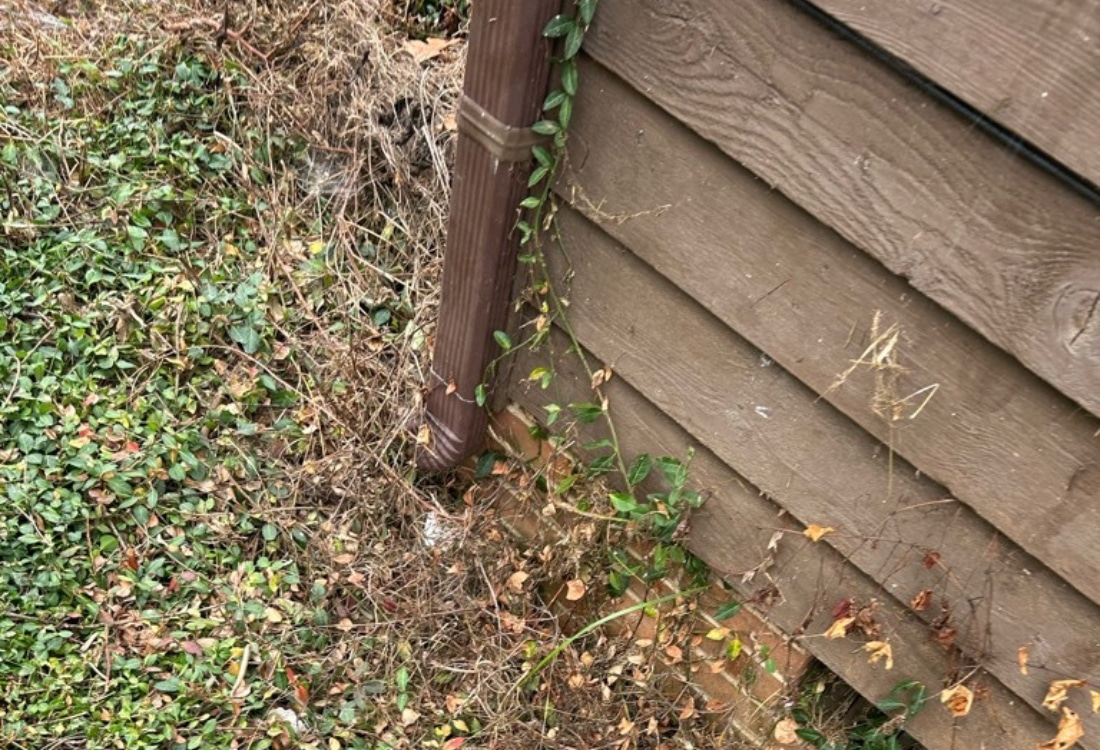
- A short downspout discharging roof runoff too close to the foundation.
In our experience, crawl space problems rarely stay isolated to the crawl space itself. Across Culpeper and Northern Virginia, excess moisture commonly causes insulation damage, weakened floor supports, and uneven or bouncy floors inside the home. Left unaddressed, these problems can get worse as seasonal rain and humidity continue adding moisture to the crawl space.
LUX recommended a comprehensive crawl space water damage repair solution that addressed both the source of the moisture and the structural concerns it had already created.
Solution: Our Proven Wet Crawl Space Repair Process
Rather than addressing only one symptom, LUX developed a comprehensive crawl space water repair plan designed to manage water intrusion, restore structural support, and create a healthier crawl space environment. It includes water management improvements, structural reinforcement, encapsulation, humidity control, and exterior drainage corrections to help protect the home from future moisture-related problems.
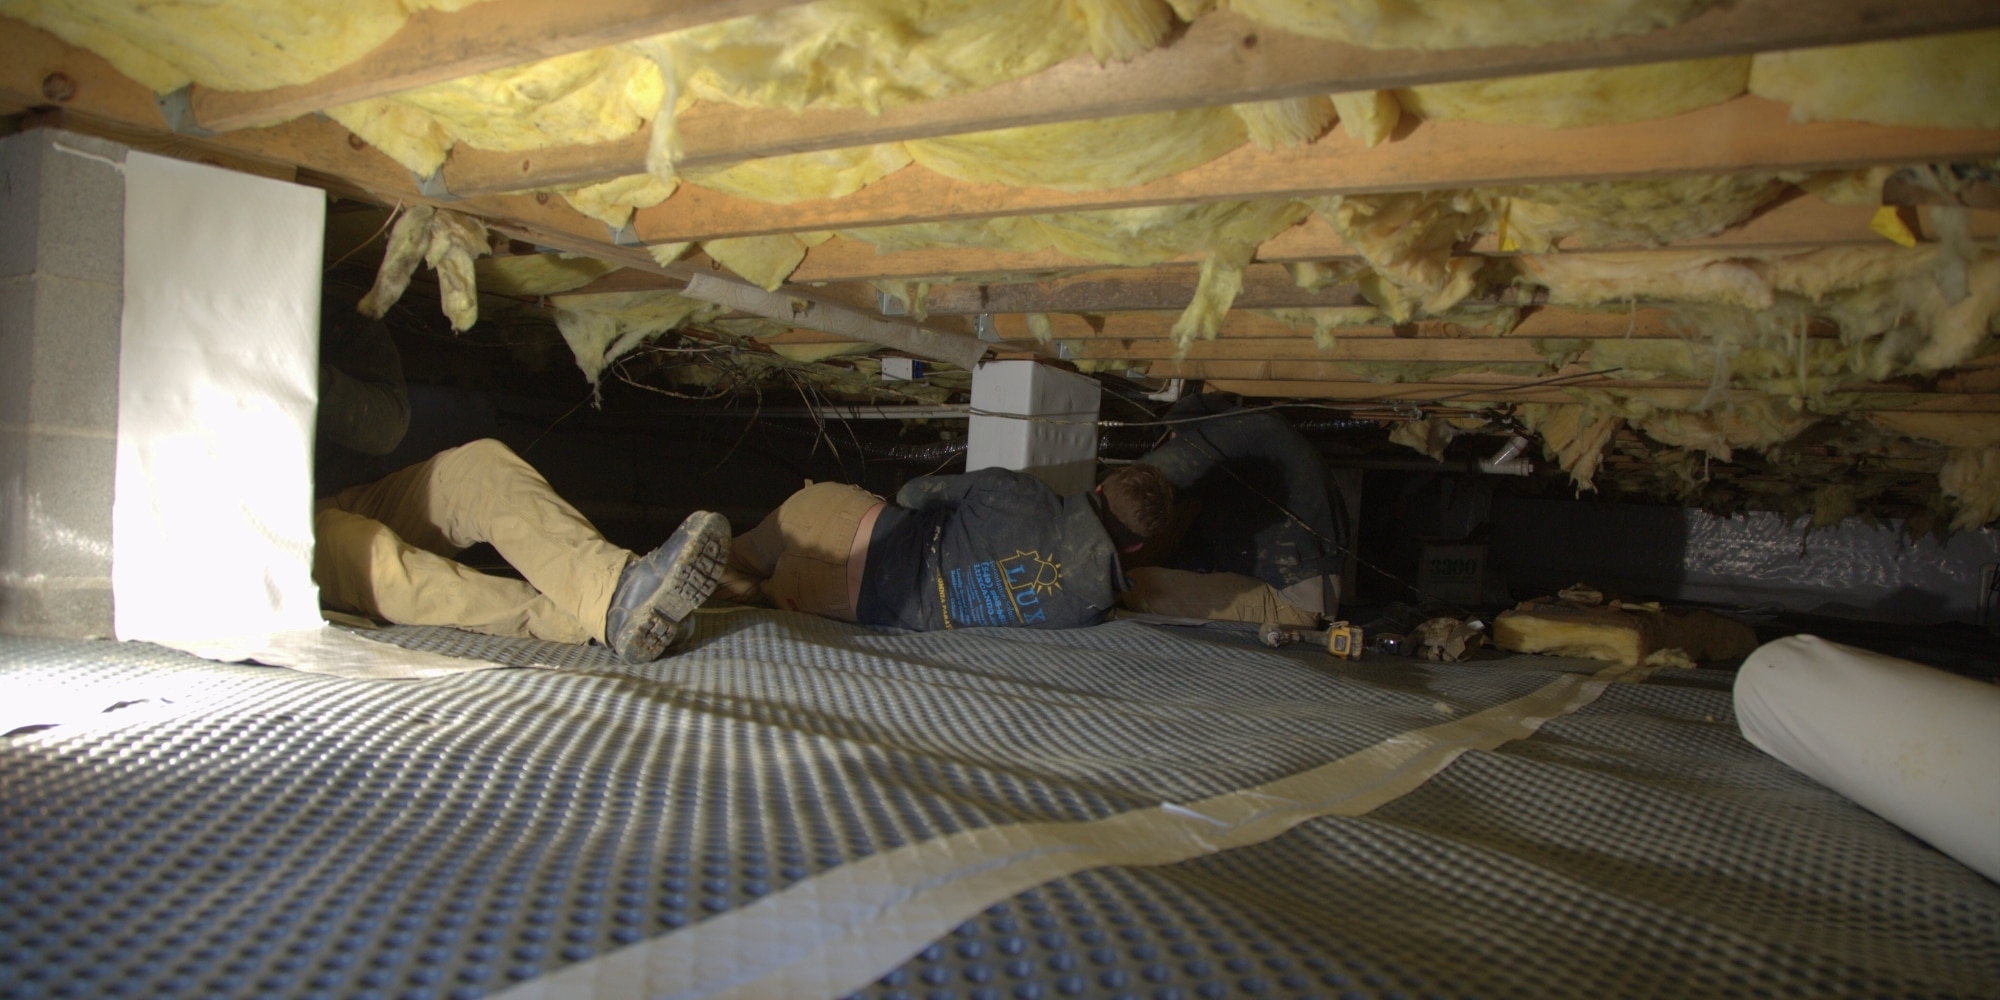
Step 1: Crawl Space Damaged Materials Removal
The team began with the removal of the damaged vapor barrier, deteriorated insulation, and debris from throughout the crawl space. Years of moisture exposure had compromised these materials, preventing them from effectively protecting the area beneath the home. Clearing out these materials allowed the team to prepare the area for the repairs that followed.
Step 2: Crawl Space Drainage Installation
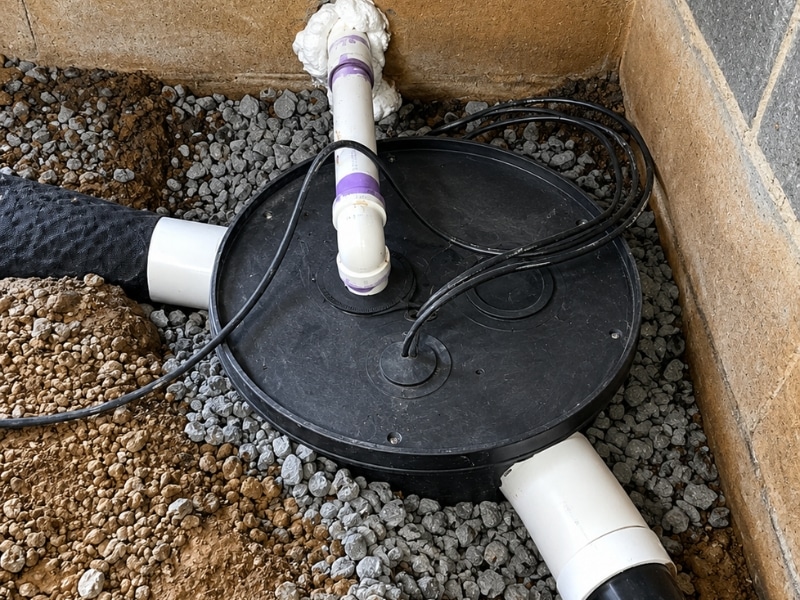
To manage water intrusion beneath the home, LUX installed a complete interior crawl space drainage system and sump pump system.
The system included:
- Interior perimeter drainage channels
- Crawl space sump pump basin
- Sump pump discharge line
Together, these components collect groundwater and direct it away from the crawl space before it can accumulate beneath the home.
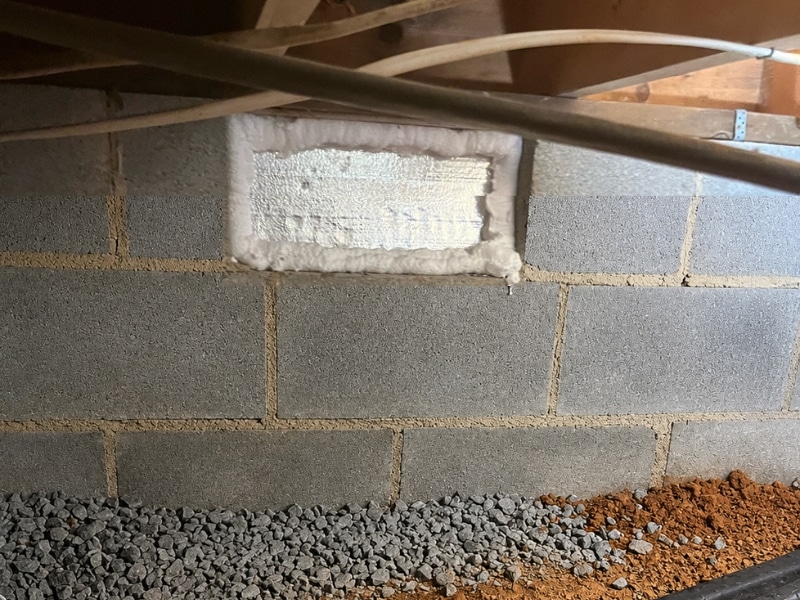
Step 3: Seal Crawl Space Vents
The existing crawl space vents were sealed to help reduce the amount of humid outside air entering the crawl space. The vent openings were insulated and sealed to support the encapsulation system and help create a more controlled environment beneath the home.
In our experience across Northwestern Virginia, open foundation vents are one of the most common contributors to ongoing crawl space moisture control problems; sealing them is a non-negotiable step in any encapsulation project.
Step 4: Re-Shim the Beam and Support Columns
To help restore floor stability, our team re-shimmed the beam and support column connections beneath the home. Our team installed steel shims where needed to eliminate gaps between structural components and improve load transfer throughout the crawl space support system.
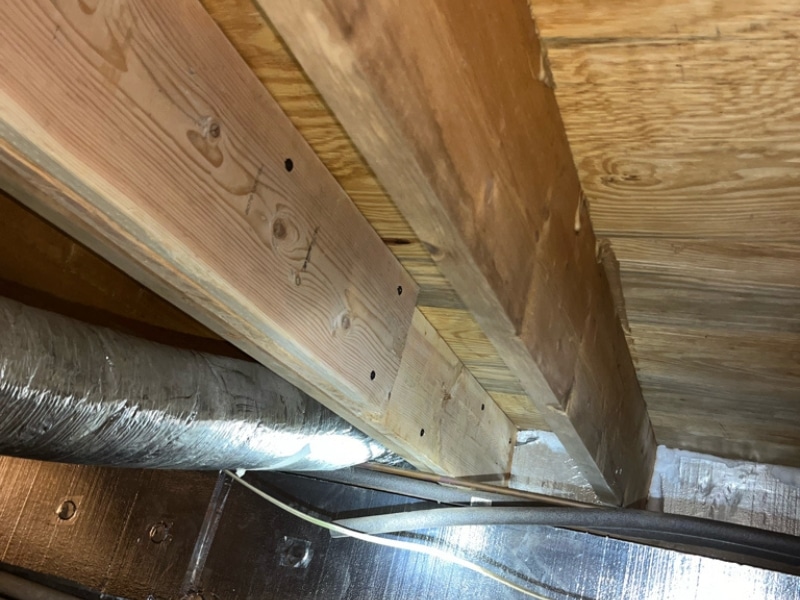
Step 5: Reinforce Damaged Floor Joists With Sister Joists
Damaged floor joists were reinforced with new sister joists installed alongside the existing framing members. This repair method strengthens weakened sections of the floor system while providing additional support to areas affected by long-term moisture exposure.
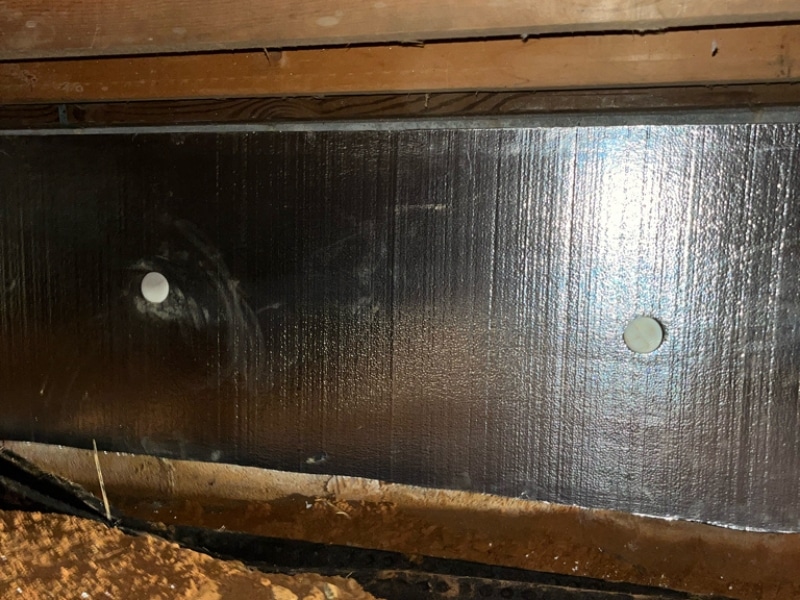
Step 6: Radiant Barrier Crawl Space Insulation Panel Installation
Poly-iso aluminum-faced radiant barrier insulation panels were installed on the crawl space foundation walls. Each panel was secured and sealed to help create a consistent insulation barrier throughout the crawl space. The insulation helps improve energy efficiency and plays an important role in controlling moisture within the repaired crawl space.
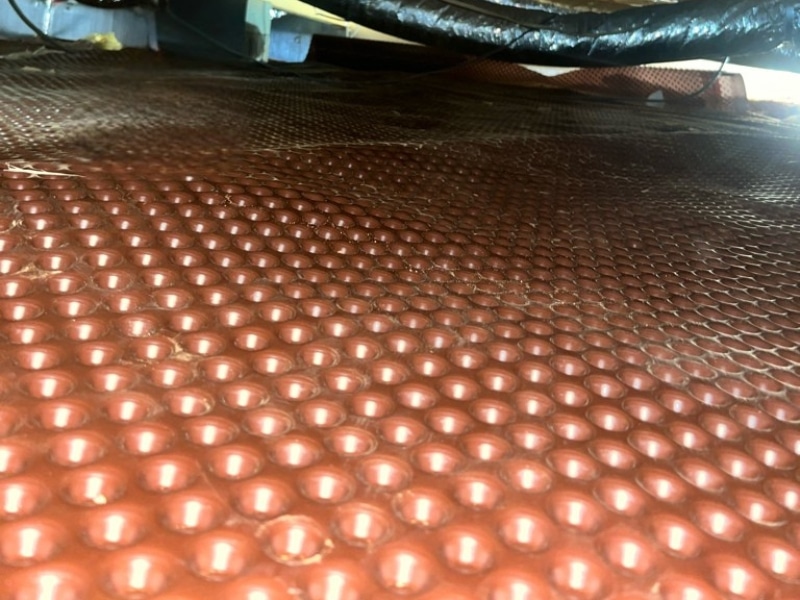
Step 7: Drainage Mat Installation
A drainage mat was installed across the crawl space floor before the vapor barrier was placed. The dimpled surface creates a separation layer between the ground and the encapsulation system, allowing water to move beneath the liner rather than becoming trapped underneath it. Skipping this step means any water that gets under the vapor barrier has nowhere to go, the drainage mat prevents that problem entirely.
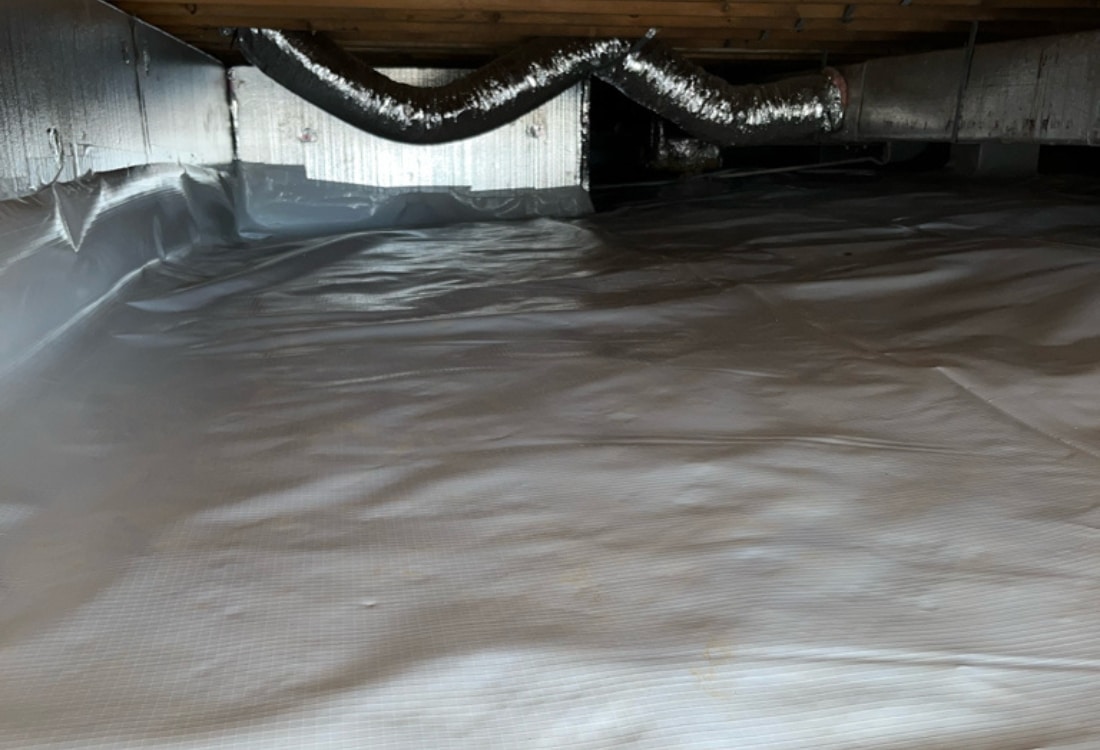
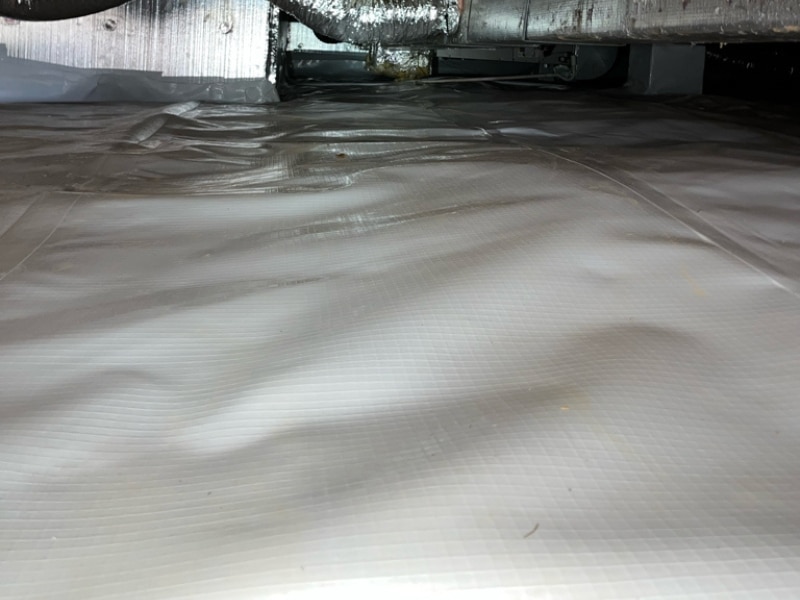
Step 8: Crawl Space Vapor Barrier Installation
After the drainage mat was installed, a heavy-duty vapor barrier was installed across the crawl space floor to help block moisture from the soil below. The vapor barrier was overlapped and sealed around pipes, supports, and other crawl space obstacles to provide complete ground moisture coverage.
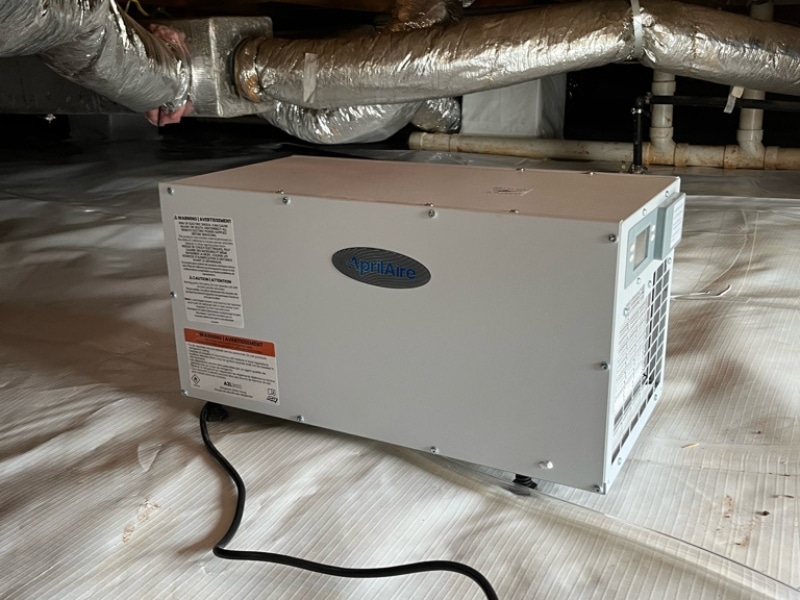
Step 9: Crawl Space Dehumidifier Installation
An Aprilaire crawl space dehumidifier was installed to keep humidity levels under control inside the encapsulated crawl space. The unit continuously removes excess moisture from the air, helping the encapsulation system continue working as intended over time.
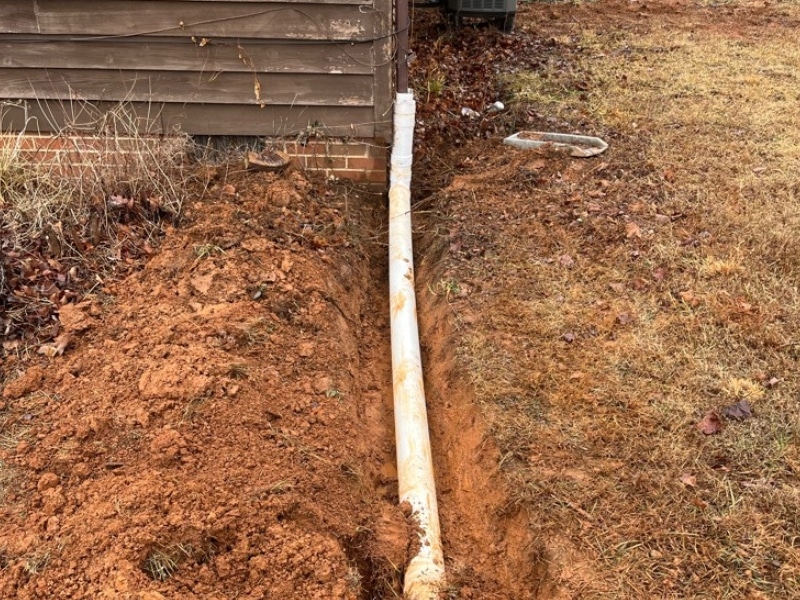
Step 10: Extend the Downspouts
The short downspout near the foundation was allowing roof runoff to collect too close to the home. To help reduce moisture around the foundation, downspout extensions were installed to move roof runoff farther away from the crawl space and foundation walls.
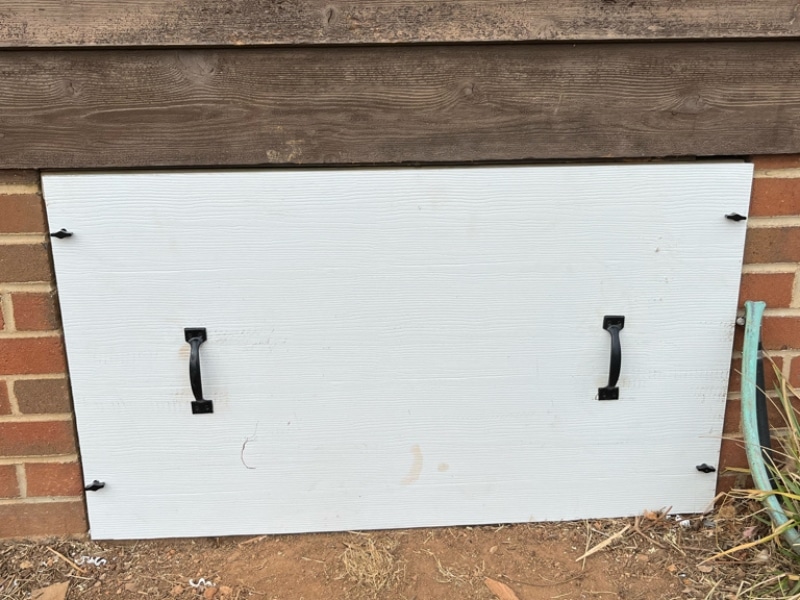
Step 11: Replace the Crawl Space Access Door
To complete the project, the existing crawl space access door was replaced with a new sealed access door. The new door helps keep the crawl space properly sealed while still allowing access for future inspections and maintenance.
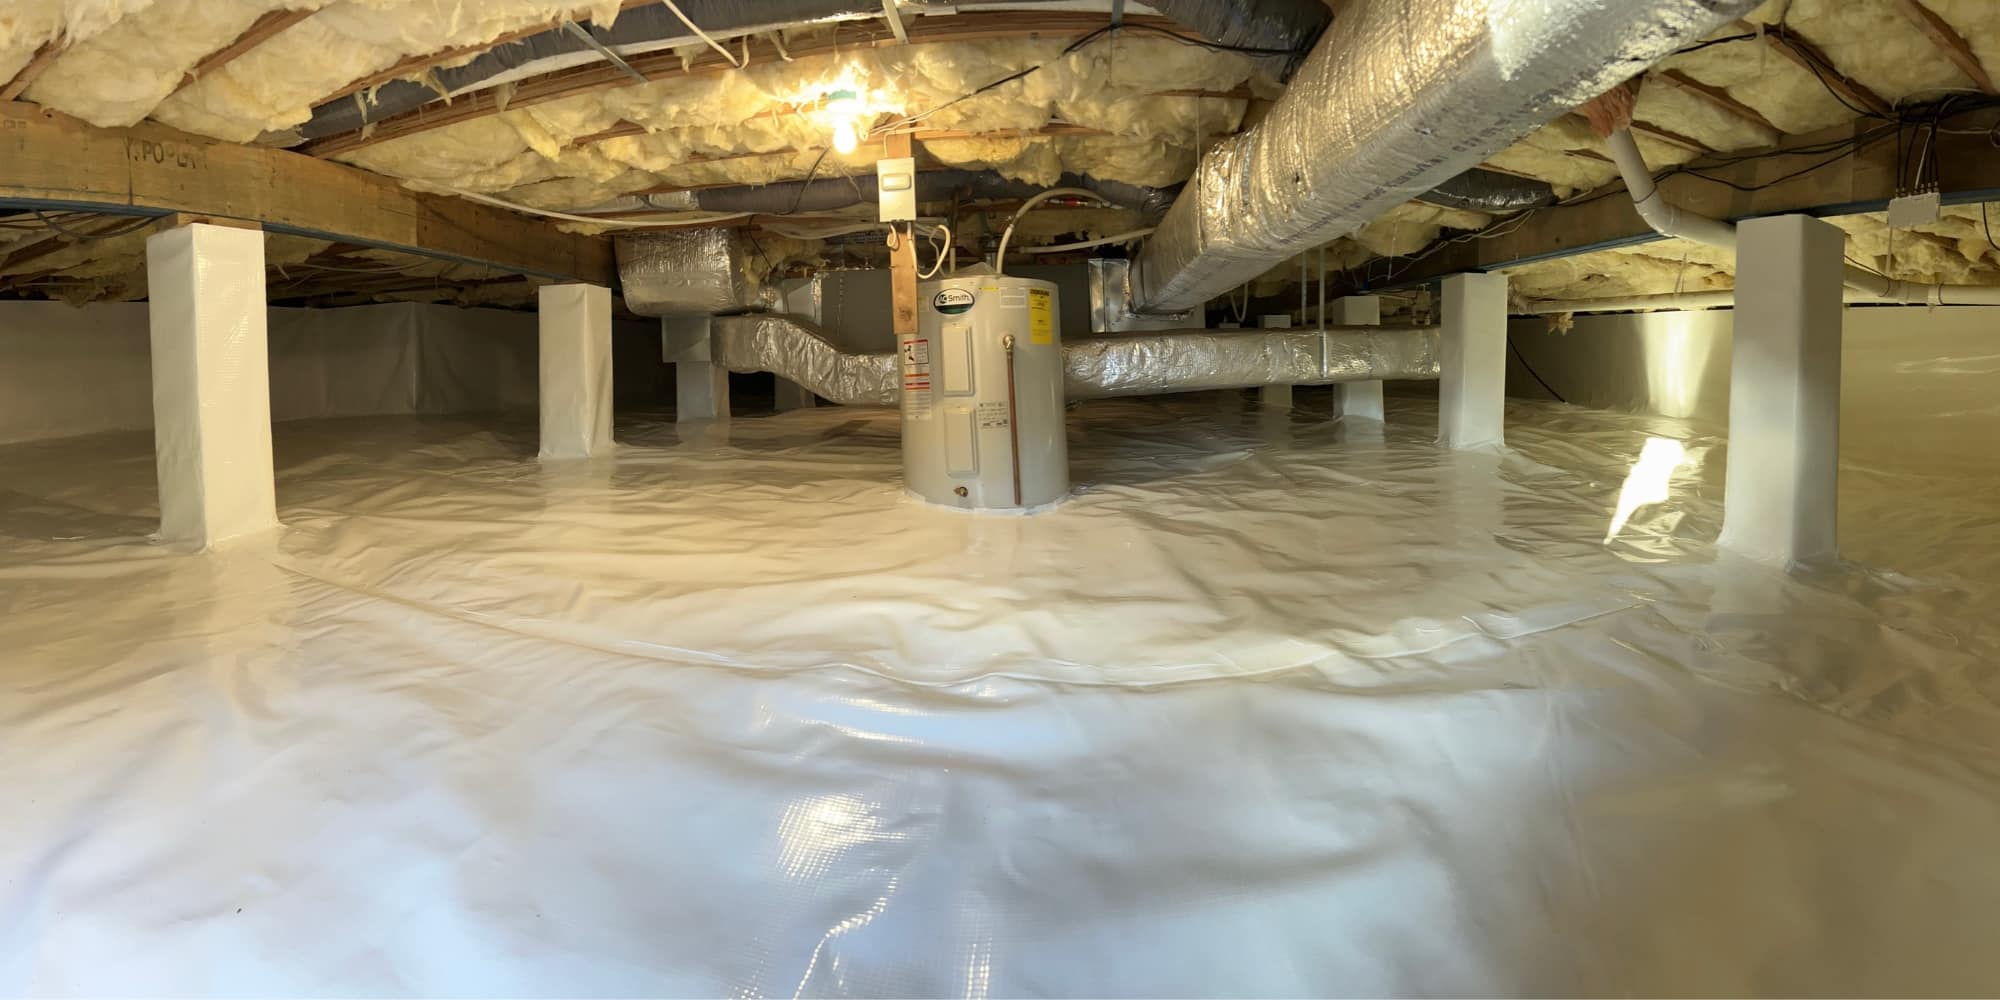
The Result: A Dryer Crawl Space and Improved Floor Stability
Before the repair, water intrusion, excess humidity, and deteriorating crawl space materials were contributing to uneven floors and concerns about the condition beneath the home. After completing the crawl space water damage repair, the space was equipped with a drainage system, structural reinforcements, encapsulation, and humidity control measures designed to address the moisture source and the damage it had already caused.
The results:
✅ Water is now collected and redirected through a dedicated drainage and sump pump system.
✅ Damaged floor supports were reinforced to help improve floor stability throughout the home.
✅ Ground moisture is isolated by a complete crawl space encapsulation system.
✅ Humid outside air is restricted through sealed crawl space vents and a new access door.
✅ A crawl space dehumidifier helps maintain controlled humidity levels year-round.
✅ Roof runoff is carried farther away from the foundation through extended downspouts.
✅ The crawl space is now cleaner, drier, and better protected against future moisture-related issues.
Across Culpeper and Northern Virginia, we often see moisture-related crawl space issues worsen structural concerns over time. In our experience, homeowners who address crawl space water problems before they progress further often avoid more extensive structural repairs down the road.
By managing moisture at its source and restoring damaged support components, this home now has a more stable and protected crawl space environment.
What the Client Had to Say
“This was a large project we should have handled years ago, but it kept getting pushed off. We finally moved forward with crawlspace encapsulation, a drainage system with sump pumps, beam support replacement, joist repairs, and downspout extension, and I’m so glad we did.
Russ did a thorough inspection, explained what was needed, and answered all of my questions without pressure. Nick and his crew made great progress from day one and communicated throughout the project. The results speak for themselves. I can already see and feel a major difference in the stability of our floors. If you’ve been putting this type of work off like we were, I highly recommend LUX.”
Christie Hurd,
Culpeper, VA
Seeing the Same Crawl Space Problems Beneath Your Home?
If you’re noticing uneven floors, moisture intrusion, musty odors, or signs of water in your crawl space, what you just saw at the Hurd home is exactly what that type of repair can look like. The longer excess moisture remains beneath a home, the greater the risk of damage to insulation, floor supports, and other structural components.
Crawl space water damage repair can address the source of the moisture while helping restore a healthier, more stable environment beneath the home. LUX Foundation Solutions serves Culpeper, VA, and communities throughout Northern Virginia with crawl space repairs and moisture control solutions.
Contact us at 540-508-8587 to schedule a free crawl space assessment today.
Gallery

About the Author

Bridget Stieb
Bridget is the Director of Marketing at Lux Foundation Solutions, bringing firsthand knowledge of the foundation repair, basement waterproofing, crawl space repair, concrete repair, and seawall needs of homeowners across Northern Virginia, the Shenandoah Valley, North Central Virginia, West Virginia, and Florida. She works closely with structural repair specialists to translate real-world inspection and repair data into homeowner guidance on foundation, basement, crawl space, and concrete issues. With a deep understanding of local homeowner concerns in both regions, she is committed to delivering clear, trustworthy content that helps families protect their homes. When she is not working on a marketing strategy, Bridget enjoys spending time with her family, friends and being outdoors.