Posted: March 27, 2024 • Updated: April 09, 2026
Your basement holds more than storage space—it can harbor hidden issues that escalate into costly repairs if left unchecked. Whether you’re conducting your annual home checkup or preparing for a professional visit, this healthy basement inspection checklist walks you through ten specific things to look for, what each finding means, and when it is time to stop observing and start calling a professional.
Key Takeaways
- Use this checklist if you suspect something is wrong with your basement and want to understand what you are looking at before calling anyone.
- Focus on four critical areas: moisture, structural walls, drainage, and air quality.
- Any active water intrusion, large cracks wider than 1/4 inch, or strong musty odors warrant calling a licensed basement inspector immediately.
- Document every finding with dated photos. This supports insurance claims and gives your inspector a rate-of-change picture.
- Repeat this checklist annually, plus after heavy rain, snowmelt, or flooding events.
How to Use This Basement Inspection Checklist
This step-by-step walkthrough takes 30–60 minutes and follows a logical sequence. Working in this order helps you trace the root causes before examining the symptoms of basement problems.
Keep a printed copy on a clipboard or use a digital app to check items off during your walkthrough. This is not a substitute for a licensed inspection before a home purchase or major renovation; it supplements professional assessments.
Repeat this checklist at least once per year, preferably toward the end of winter or the start of spring, when moisture levels tend to be at their highest from snowmelt.
Step 1: Inspect Exterior Foundation
Most basement water problems start outside. According to industry analyses, roughly 80% of water intrusion issues originate from surface drainage failures.
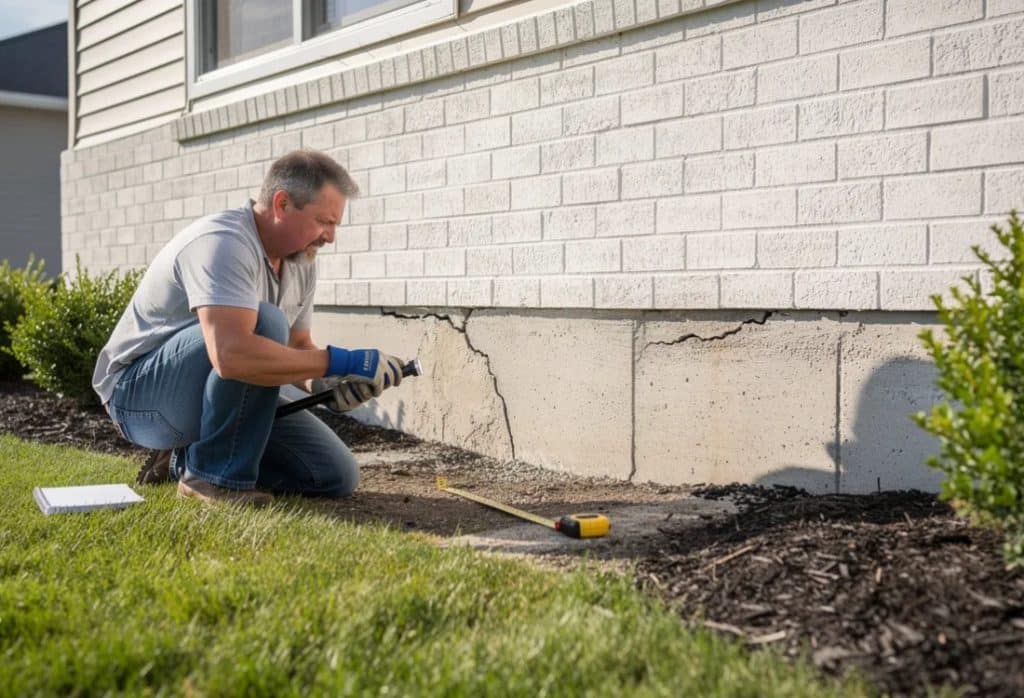
Northern Virginia’s expansive clay soil contracts in dry summers and expands when saturated. This cycle is the primary driver of exterior foundation damage in the region. Begin your inspection on a dry day so you can spot staining from past water issues without fresh moisture obscuring the signs.
Visual checks for exterior foundation walls:
- Inspect the exterior foundation walls for horizontal cracks, shifting, or visible displacement.
- Check the soil grading around the perimeter. Ground should slope away from the foundation at a minimum of 6 inches over 10 feet.
- Look for soil erosion or gaps where the ground has pulled away from the foundation wall. These gaps channel water directly against the footing.
- Check for water pooling near the foundation 24 to 48 hours after a rainfall.
- Inspect concrete patios, walkways, and driveways for signs of settling that could be causing water to flow toward the basement walls.
- Check exterior basement entrances, bulkhead doors, and stairwells for cracked caulking, damaged seals, or standing water after rain.
Step 2: Check Interior Foundation Walls and Floor Slab
With exterior checks complete, move inside to assess foundation walls for visible cracks, bowing, and movement. Use a bright flashlight rated at over 500 lumens to reveal shadow lines indicating surface irregularities.
Walk around your basement walls and floor, noting any cracks, their locations and sizes, and whether they appear to be new or growing. Take note of any cracks that leak water during or after rain, widen over time, or appear alongside any shifting or movement in the walls.
Floor slab checks:
- Look for heaving, wide cracks, corner cracks, or areas where the slab has dropped.
- Note separation from walls exceeding 1/2-inch.
- Examine recent patching or epoxy repairs for new movements.
Photograph each notable crack with a tape measure and record the date. This documentation tracks progression over time.
If you spot anything that looks off, do not attempt to seal it yourself before getting a professional assessment. See our detailed foundation crack guide to understand what your specific cracks may mean
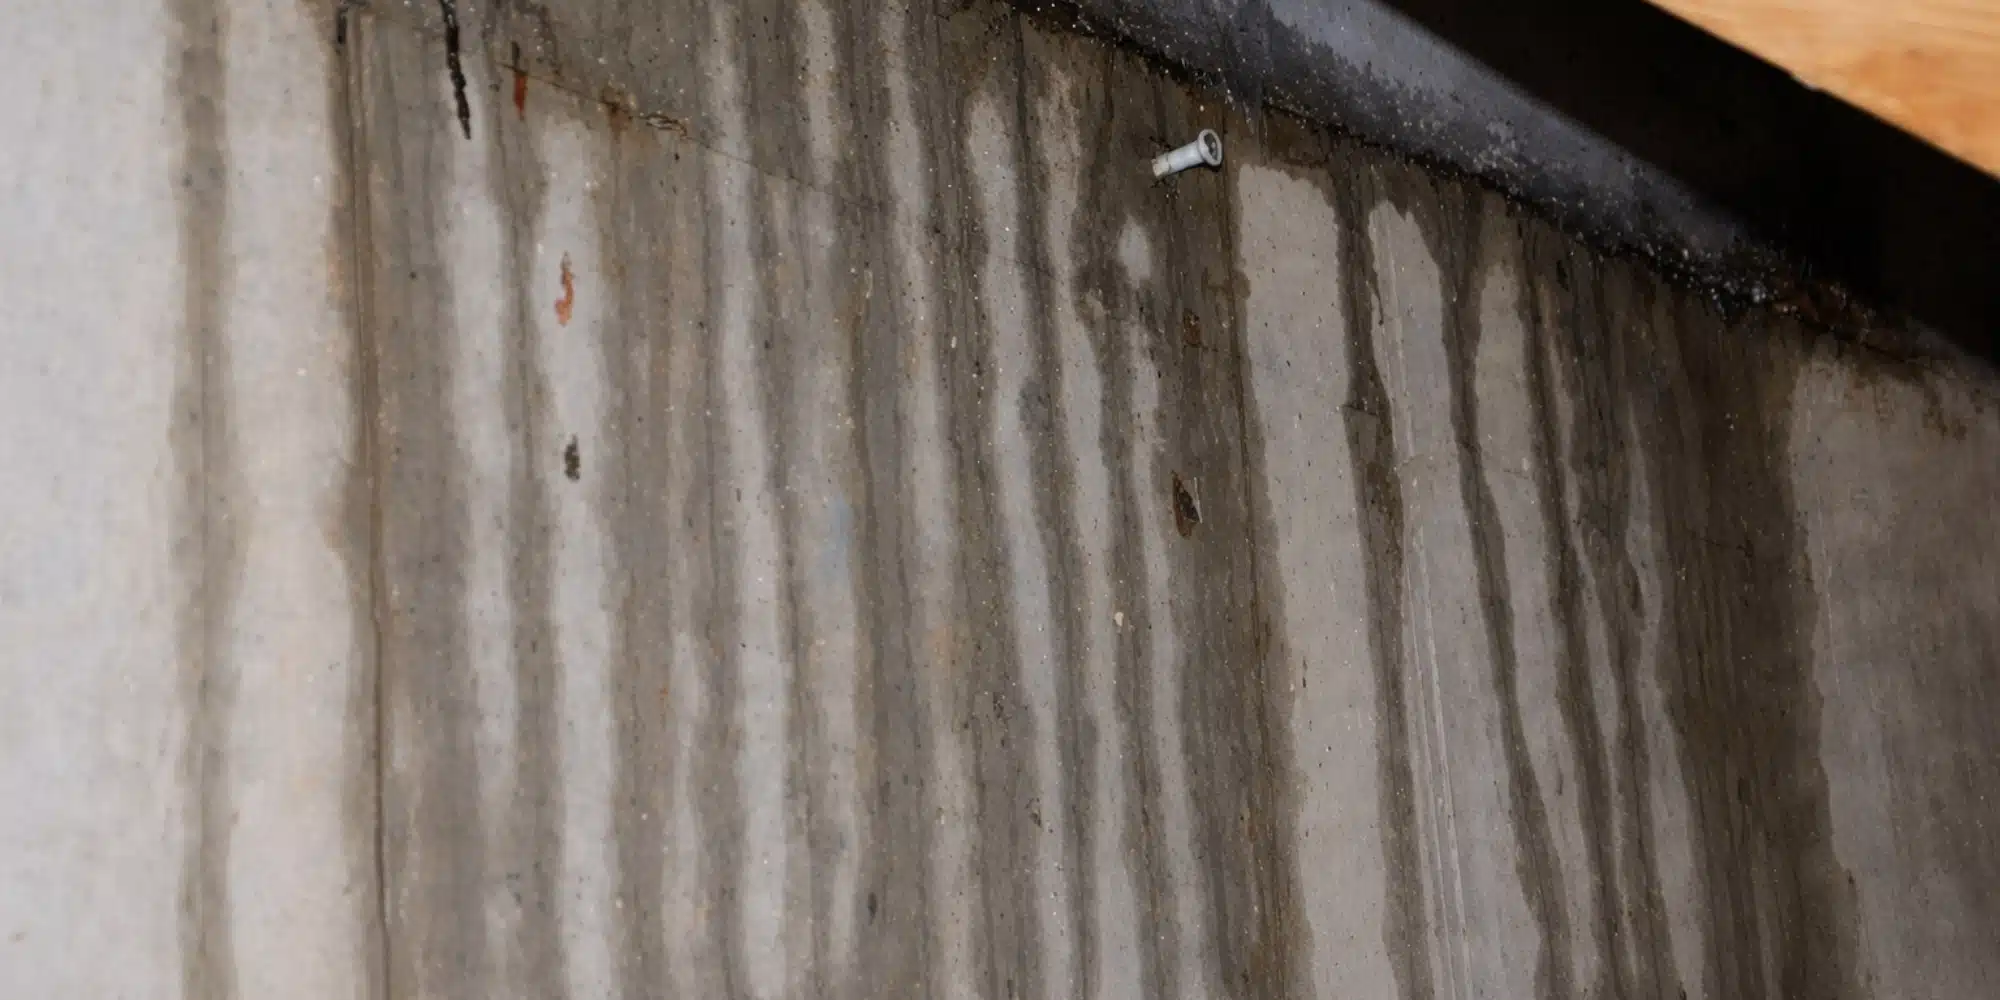
Step 3: Check for Moisture, Water Intrusion, Stains, an Mold
Water damage accounts for 60–70% of basement claims according to insurance industry reports. In Northern Virginia’s clay-dominant soil, water seeps through cracks. This inspection relies on visual, touch, and smell checks to identify current or past basement leaks.
Wall and floor inspection:
- Scan for water stains, efflorescence (white powdery deposits).
- Bubbling or peeling paint on the basement walls. Paint traps moisture and eventually fails.
- Check the floor perimeter and cold joints where walls meet the slab
- Look for puddles or mineral deposits indicating water seeping through.
- Rust stains around sump pump basins, floor drains, or near metal fixtures.
Mold does not just look and smell bad. It affects your family’s health and degrades structural wood components over time. Because basements share air circulation with the rest of your home through the stack effect, basement mold rarely stays contained to the basement.
The smell test: Note any persistent musty or earthy smell, even without visible water. These can indicate microbial volatile organic compounds from hidden mold growth.
Mold indicators include black, green, or white fuzzy growth on drywall, wood structures, or around the base of walls. Large areas exceeding 10 square feet require professional remediation.
Hidden moisture checks:
- Pull stored boxes and furniture away from the walls.
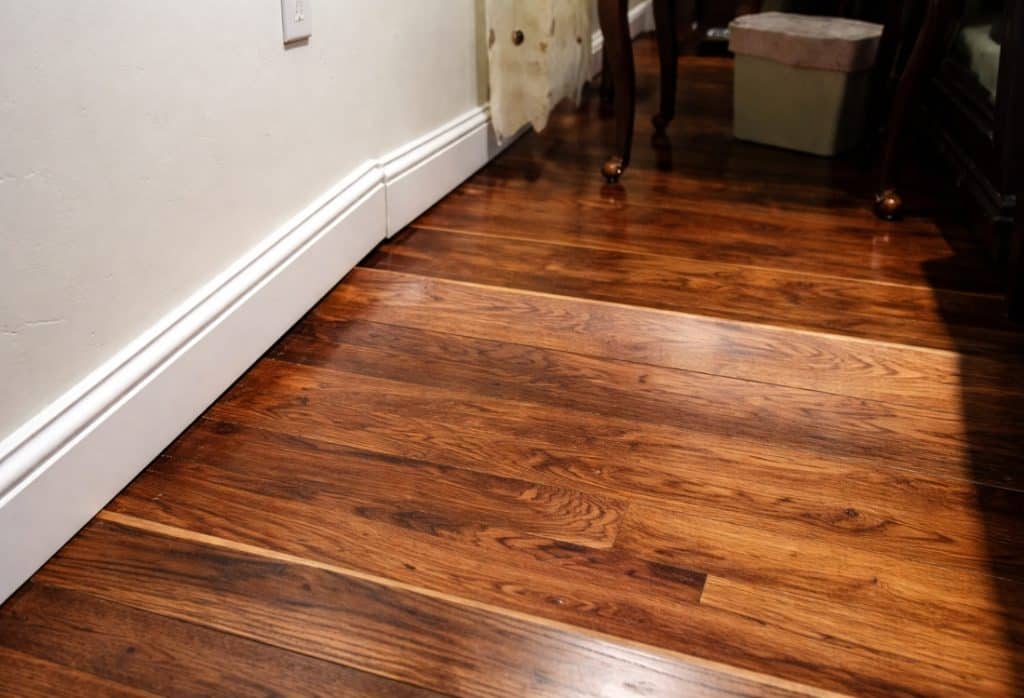
- Inspect behind shelving for dampness or mold, and check baseboards for mold.
- Check window wells and areas under exterior stairwells.
Use a basic hygrometer to record relative humidity. Readings consistently above 60% indicate excess moisture that requires attention. Areas prone to condensation need better air circulation or dehumidification.
Step 4: Test Your Drainage System and Sump Pump
Your basement’s drainage system, such as gutters, downspouts, grading, interior drains, and sump pump, is your first defense against water intrusion. Failure at any one point can overwhelm the others.
Verify these systems are ready before the next storm.
Sump pump checklist:
- Locate the pit and remove the lid to make sure a pump is installed and in place.
- Test the system manually by lifting the float or pouring water until the pump cycles.
- Verify that the discharge line carries water away from the foundation and releases it at least 10 feet from the foundation.
- Check that discharge doesn’t connect to sanitary sewer (prohibited in 80% of jurisdictions)
- Check that the pump has a dedicated outlet, a power source, and a battery backup if one is installed.
Drainage inspection:
- Check the interior French drain or perimeter drainage for overflow signs.
- Inspect gutters for blockages, especially before spring and fall rainfall seasons.
- Look for standing water near the foundation 24 to 48 hours after a rain event.
- Check that downspout extensions direct water at least 6 feet from the foundation (10 feet preferred).
A properly functioning sump pump should discharge 1,800–3,600 GPH. During Northern Virginia’s heavy spring rainfall season, small leaks or clogs in these systems can cause a basement to flood within hours.
Step 5: Check Humidity Levels
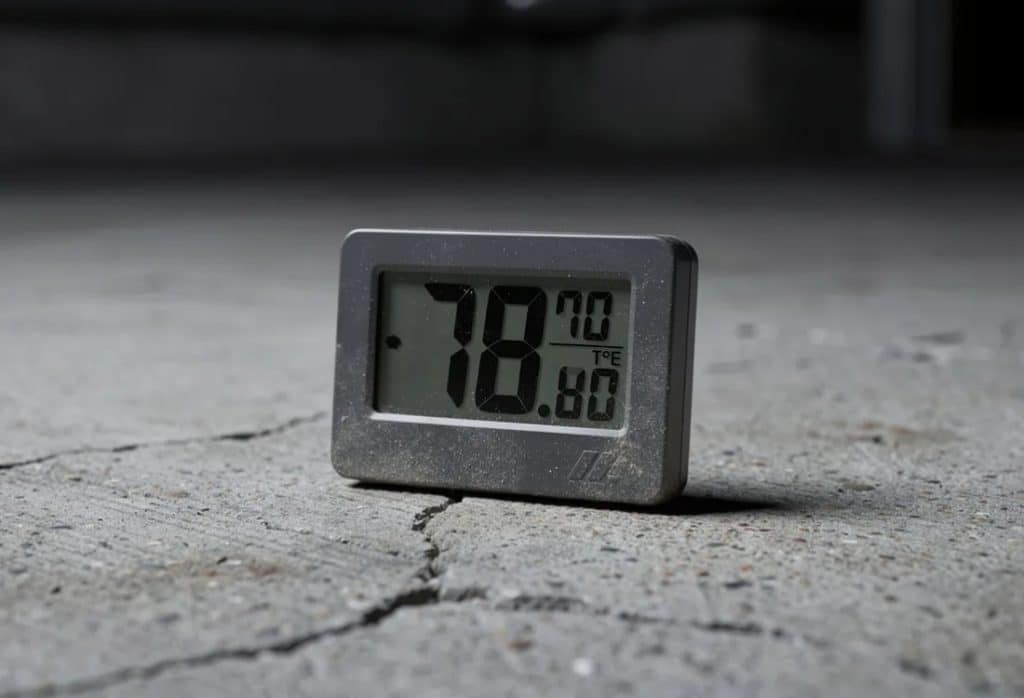
If your basement has a dehumidifier, inspect it during your walkthrough. High humidity above 60 percent is the single biggest driver of mold growth, and a failing dehumidifier often gives no visible warning.
- Check the humidity reading. A healthy basement maintains a relative humidity of 30 to 50 percent. Above 60 percent requires immediate action.
- Clean or replace the filter. A clogged filter is the most common reason a dehumidifier underperforms.
- Check the water reservoir. If it fills within 24 hours, moisture levels are high and warrant a professional assessment.
- Confirm the unit is cycling properly. Continuous running without cycling off may indicate it is undersized. Never running may indicate a sensor failure.
- If you do not have a dehumidifier and humidity consistently exceeds 50 percent, schedule a professional moisture assessment. A 50- to 70-pint-per-day dehumidifier helps manage symptoms while the underlying water intrusion source is addressed.
Step 6: Check Temperature, Air Movement, and Ventilation Clues
Subtle temperature and airflow changes reveal hidden moisture issues or air-quality problems that a visual inspection might miss.
Temperature checks:
- Walk across the floor barefoot and watch for areas that feel noticeably colder or damp. Spots below about 55°F can point to moisture wicking up from the ground.
- Look for sections of the walls or corners that feel colder than the surrounding surfaces.
- Check basement windows for persistent condensation or water on sills.
Ventilation assessment:
- Verify that mechanical ventilation, exhaust fans, or air exchangers are running properly and venting outside, with clean filters in place.
- Note “dead air” corners where air seems stale; these need better circulation.
- Monitor stagnant areas where RH exceeds 70%.
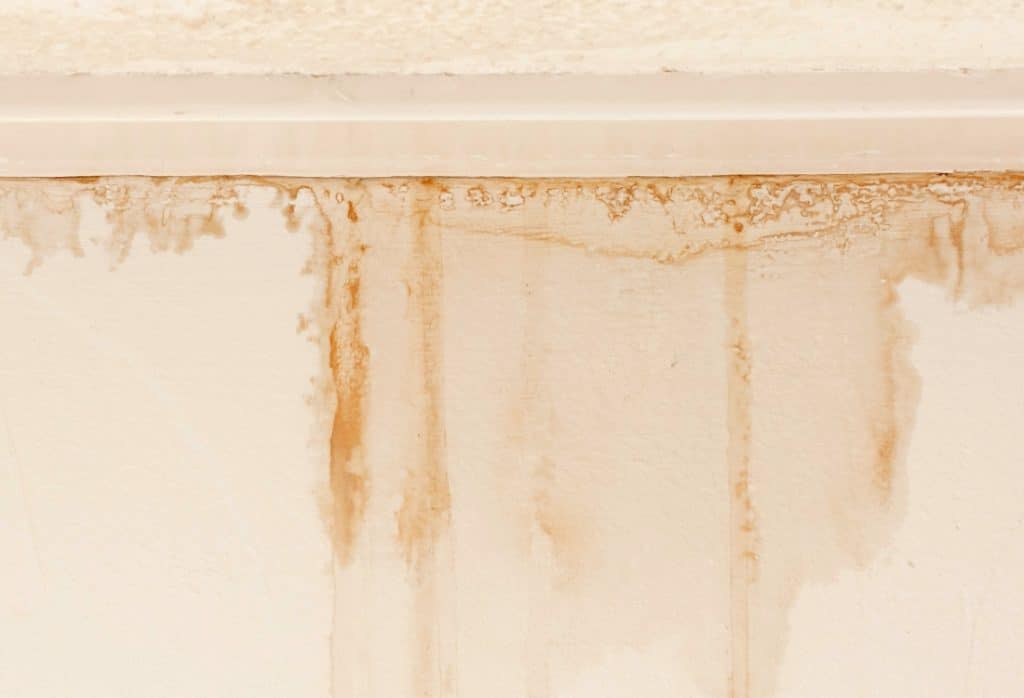
Step 7: Check Interior Finishes such as Drywall, Paint, Trim, and Flooring
Finished basements hide structural elements behind walls and flooring. Surface clues like sagging, peeling, and discoloration reveal underlying issues.
Wall and ceiling inspection:
- Look for blistering or peeling paint, indicating past water intrusion.
- Check for sagging drywall near exterior walls and plumbing chases.
- Inspect baseboards, door trim, and window casings for swelling or soft, crumbly wood, which may indicate rot.
Flooring checks:
- Examine vinyl plank, laminate, or carpet for buckling, warping, or soft spots.
- Musty odor when lifting flooring edges.
- Tap tiled areas, listening for hollow sounds indicating voids beneath.
Pull at least one accessible baseboard or ceiling tile from a hidden corner annually to check for concealed mold or leaks.
Step 8: Evaluate Insulation and Vapor Barriers
Improperly installed or wet insulation can hide serious moisture issues and attract pests. Check all accessible insulation areas.
Insulation assessment:
- Examine exposed fiberglass batts on rim joists for sagging, discoloration, or a dense, heavy feel.
- Check rigid foam or spray foam for gaps at seams or where it separates from walls.
- Verify that vapor barriers are on the correct side for your climate (warm side in cold climates).
- Look for rodent tunnels, droppings, or shredded material.
Replace any insulation showing visible mold growth, strong musty odor, or long-term wetting—damaged insulation loses 50% of R-value when wet.
Step 9: Look for Pest and Insect Activity
Pests exploit damp, dark basements and can signal entry points or structural gaps in your home’s foundation.
Signs to look for:
- Termite mud tubes along sill plates, support beams, and floor joists
- Carpenter ant frass (sawdust pellets) near wood framing
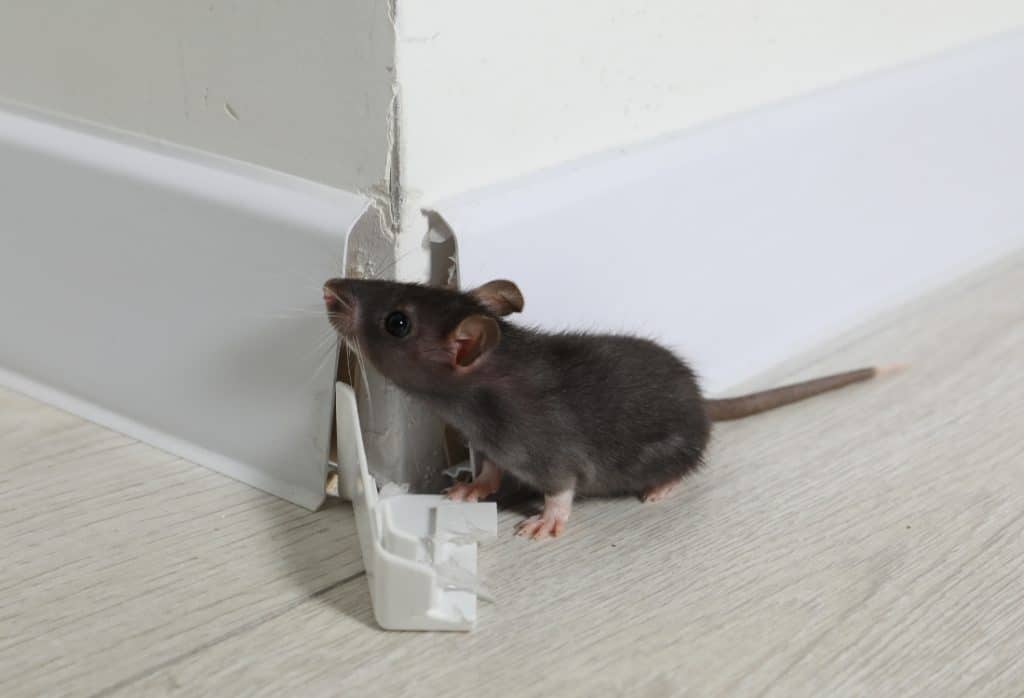
- Mouse or rat droppings, nesting material, and gnaw marks
- Gaps around windows, vents, and utility penetrations
Dead insects such as millipedes, silverfish, or crickets in damp areas often indicate moisture problems. These pests thrive in humidity levels above 75%. If you’re dealing with widespread termite activity or rodent issues, it’s best to bring in a professional pest control service.
Step 10: Test for Odors, Air Quality, and Radon
Long-term health issues stem from unseen air quality problems. Protect your family by addressing odors and testing for radon.
Odor investigation:
- Note persistent musty, sewage, or chemical odors.
- Trace odors to sources: drains, storage areas, mold, or fuel.
- Check floor drains and unused fixtures for dried P-traps.
According to the National Cancer Institute, long-term exposure to high levels of radon gas has been linked to lung cancer. Therefore, testing for radon is critical to maintaining a healthy home.
Radon testing: Every home with a basement should complete at least one radon test using short-term kits or continuous monitors. The EPA action level is 4 pCi/L—approximately 1 in 15 U.S. homes exceed this threshold. If radon levels exceed guidelines, consult a certified mitigation contractor.
Family members with allergies or asthma should monitor their symptoms when spending time in the basement.
Basement Inspection Schedule and Documentation
Consistency and record-keeping make this checklist valuable over the years of homeownership.
Recommended schedule:
- Perform a full inspection at least once a year, ideally in spring.
- Do quick checks after heavy rain or snowmelt.
- Inspect immediately after any flooding event.
Documentation practices:
- Create a dedicated “Basement Inspection” folder (digital or paper).
- Store dated photos with scale references.
- Mark repeat problem areas on a floor plan sketch.
- Flag new cracks, leaks, or humidity changes for professional follow-up.
- Share dated photos and notes when you schedule a free assessment. It allows the inspector team to assess the rate of change, not just the current condition, to improve structural integrity.
When Should I Call a Professional Instead of Relying on this Checklist?
Some findings require professional assessment to be diagnosed correctly and repaired permanently. Contact LUX Foundation Solutions if you notice any of the following:
- Active water seeping through walls, the floor-wall seam, or any crack. Surface sealants do not solve active water intrusion. A waterproofing assessment is needed to identify the source and the right system.
- Any inward bowing, bulging, or leaning of basement walls. This is a structural emergency. Do not wait, call immediately.
- Cracks that are growing, widening, or actively leaking. A crack that was stable last year but is wider this year indicates active movement. Get it evaluated before it worsens.
- Visible mold on any surface in your basement. Call a mold remediation professional. The moisture source must be fixed at the same time, or mold will return.
- Sump pump failure with spring rains approaching. Emergency sump pump installation and repair are available. Do not wait until after a flood event.
- Radon levels above 4 pCi/L. This is the EPA action level. Contact a radon mitigation specialist. Do not attempt radon mitigation as a DIY project.
- Recurring dampness, stains, or mold in the same spots year after year. A problem that keeps returning was never fully resolved. A professional evaluation will identify the root cause, not just the symptom.
If you are not sure what you are seeing, that is reason enough to call. A thorough inspection from our team is always better than waiting and watching a small problem become a costly one.
Get a Free Basement Assessment from LUX Foundation Solutions
Not sure what you are seeing in your basement? Our team has inspected thousands of basements across Northern Virginia, the Shenandoah Valley, North Central Virginia, and West Virginia. We identify the root cause, not just the symptom, and give you honest, no-pressure recommendations.
Call us at 540-508-8587 or fill out our online form to schedule your free basement inspection today.
FAQ
How often should I do a full basement inspection at home?
Inspect your basement at least once annually, ideally in late winter or early spring when snowmelt creates peak moisture conditions. After any major storm, or if your house is in a flood-prone or high-water-table area, you should add quick visual checks after every major storm to catch foundation problems early.
Can a dehumidifier fix most basement moisture problems on its own?
Dehumidifiers help control humidity but don’t address root causes like poor grading, leaks, or foundation cracks. Use them as part of a broader strategy that includes drainage improvements and repairs. A 50–70 pint/day unit manages symptoms while you address the underlying water intrusion.
Is it safe to finish a basement that has had water issues in the past?
Wait until all active leaks are resolved and the space remains dry through at least one wet season. If there is mold, get it professionally removed before a single piece of drywall goes up. Once the basement has proven itself dry, the right combination of insulation, vapor barriers, and raised flooring will protect everything you put into it.
What simple tools do I need to complete this basement checklist?
You probably already have most of what you need. A flashlight bright enough to cast shadows, your phone for photos, and a tape measure or ruler to size any cracks. The one thing worth buying if you do not have it is a hygrometer. If you want to go further, a moisture meter and a radon test kit.
Can I waterproof my basement myself?
Surface-applied sealants may temporarily reduce minor condensation, but do not solve structural water intrusion. If water is entering through cracks, through the floor-wall seam, or through hydrostatic pressure in the walls, professional waterproofing systems (interior drainage, exterior waterproofing membranes, or sump pump installation) are required.